Thursday, May 24, 2007

Rice: Chicken and peanut congee with conpoy

Marky and I were having congee cravings the other day so I invited him over my house yesterday for a congee dinner. It was not just any normal congee because of the additional conpoy. (Yum yum) Conpoy is great with congee as it add a tinge of sweetness to the congee.

As Marky is a self-proclaimed carnivore, I had to add in generous servings of meat to satisfy him. Chicken thigh meat was choosen as that's my favourite part of the chicken too =)

As my mum was at home, she can't resist not helping me with the preparations and cooking (Typical mum - Can't leave her usual tasks to others. Must get her hands on everything.) And so, both of us prepared dinner together. (With lots of nagging here and there.) However, it was good that she helped out as there was quite a bit of preparatory work to be done.

A tip from my mum
Adding some oil and salt into your rice when cooking will ensure that your congee will have a good consistency.

The end results ---->
Thick, sweet and tasty congee which blends well with the ingredients. Great for days when you feel like having something light.
CCC

Chicken and peanut congee
(Serves 5-6)


Ingredients:
1 1/2 cups of rice
Chicken stock (Instructions below)
2 chicken thighs, shredded
1 can of braised peanuts
A small handful of dried bee hoon, deep fried
1 stalk of spring onion, chopped
Dough fritters (you tiao)
Egg (1 per person)


Method:

1) Season the chicken thighs and bones with salt and leave them for around 1/2 hr before washing off the salt.

2) Cook the chicken stock by boiling chicken bones, chicken thighs, conpoy, 1 carrot and 1/2 a chicken stock cube together.

3) Boil for at least 1 1/2 hrs.

4) Take the chicken thighs out and season with sesame oil (Sprinkle light soy sauce if the meat is still bland.)

5) Place washed rice in a pot and pour chicken stock to cover the rice. Add in the conpoy and some carrots to increase the sweetness of the congee.

6) Cook the rice over small fire and stir occasionally to prevent the rice from sticking.


7) When the congee reached the last stage of cooking (3rd picture), stir continuously to make the rice grains break up further to give a thick consistency.

8) Ensure that the congee is boiling before pouring into a bowl and crack an egg directly into the congee.

9) Add the ingredients and garnishing.


From far left (clockwise):
Dough fritter, deep fried bee hoon, shredded chicken thigh meat, braised peanuts, spring onions, egg


Friday, May 18, 2007

Interruption to my foodblog: Practicum and thoughts

After completing 10 weeks of practicum, I could finally heave a sigh of relief. Although it was a period full of ups and downs, I was glad that I've put in all I have to teach them because I know that they recognised my efforts.


The rewards of teaching didn't come until the last day when I read all the cards given to me by the kids. It was then that I feel much appreciated and touched by them...I really miss teaching them but at least I can still look forward to the chalet that was organised by Adeline for them.


Monday, May 14, 2007

Seafood: Veggies: Breaded fish and mushroom potato

I've invited my dear friend recently for dinner at my house and as usual, she was my guinea pig. Haha...It wasn't exactly the best meal due to the saltiness of the fish. My dearest mummy told me to add more salt to the fish and in the end, the fish was really salty =Þ I shall adjust the salt next time.

I enjoyed eating the mushroom potato most as it was a combination of my favourite food. However, my dear friend commented that the mushroom taste was not very strong and I found out later that it was because of the mayonnaise that was added to make the consistency better.


Clockwise from bottom right: Salty breaded dory (A mishap), oven baked white button mushrooms with sauteed onions on a bed of carrots, broccoli, mushroom potato.


My favourite of the day --> Mushrooms, potatoes and onions


Things to do beforehand
- Sauté 1 yellow onion with olive oil, salt and pepper.
- Sauté a mixture of shiitake and white button mushrooms with olive oil, salt and pepper.

Method
1) Boil potato till semi-soft
(If you do not have time to bake the potato for 45mins)

2) Brush some olive oil on the oven tray.

3) Cut off one end of the potato so that it can stand.

4) Then, sprinkle a little salt and a drizzle of olive oil on the potato's skin

5) Bake @ 175°C till soft and scoop out the insides of the potato and place into a bowl.

6) Mix in the mushrooms and add a small dollop of mayonnaise for better consistency. Sprinkle some salt and pepper.
(Note that mayonnaise covers the taste of the mushrooms so refrain from using too much if u like a strong mushroom taste)

7) Scoop the mixture back into the potato skins.

8) Drizzle some olive oil on the top of the mixture and send it back into the oven for another 15mins or so.

9) Add the sauté onions on top of the potato for garnishing


Oven baked button mushrooms with just salt, pepper and a abit of butter on it.

Although this hasn't been the best meal but I shall try to improve on this the next time round.

Sunday, May 13, 2007

Meat: Bacon wrapped asparagus & Bacon wrapped water chestnut

It has been a very long break of 10 weeks. Finally, I have the time to update my blog. And as noticed by Marky, I've gotten a complaint about not updating since my practicum has ended. (You know who u are...lol)

Anyway, I'm going to recommend a very simple yet delicious finger food that is great for parties or BBQs ---> Bacon wrapped asparagus & Bacon wrapped water chestnut.

There are actually a variety of ways that you can cook this for example, frying, baking and barbequing. I actually prefer baking but my mum commented that frying on a non-stick pan is better as it is more crisp. I've given you the choices, it's now up to you to choose your favourite cooking methods =)

The reason why this is a hit among my family, friends and I is because of the heavenly combination of the salty bacon and the crisp vegetables. My favourite is the water chestnut as it doesn't shrink or turns soft when cooking and its sweetness really complements the bacon very well.

Enough of saying.. Let's get on with the extremely easy recipe!


Bacon wrapped asparagus/water chestnut


Ingredients
Bacon strips
Baby asparagus, divide into 4 bunches. Ard 4-5cm each
(You may opt to use large asparagus)
Water chestnuts, washed, skinned and cut into halves
Tomato sauce
(Optional, but I find that the bacon taste nicer when you brush a little on top)
Chinese Parsley (Coriander), chopped (Optional, but I also prefer to have this)
Black pepper

Toothpicks to skewer the bacon and vegetables.

Method
1) Preheat your oven to 200ºC (May vary from oven to oven)

2) Place 3 or 4 pieces of asparagus on a slice of bacon and wrap the vegetable with the bacon. (If you find the bacon too long, you may want to cut the bacon into half.)


3) Skewer with a toothpick to secure it.


4) Do the same for the halved chestnuts.


5
) Once you have all your skewered bacons, place them flat on the baking tray.

6) Brush some tomato sauce over the bacon then sprinkle black pepper and chopped chinese parsley over the top.

7) Bake for 10-12minutes or until bacon is crisp and asparagus bundle is tender.


Friday, April 06, 2007

Interruption to my foodblog: A long break for me

Dear friends,

This blog has been stagnant for a long time and this will continue till 11th May when I have time to myself. Practicum is killing me...physically and mentally. I hope I won't become deranged at the end of my practicum.

I missed cooking...

Sunday, March 11, 2007

On Food: Traditional Cooking spotted at Ah ma's house

Recently, I found my mum cooking at my Ah ma's house. You must be thinking what's so interesting about that and you might be on the verge of clicking that "x" at the top right hand of your browser.

STOP right there!

Let me show you some pictures that you may have never seen in your entire life.


Check this out! I'm sure nobody's mum cooks using charcoal while squatting down right? I bet mine's the 1st and I'm proud about that! Haha.. Just a lame post to make up for my absence.

Friday, February 23, 2007

Sweetbakes: Thick cocoa brownies

I know it's kinda weird to bake brownies during CNY season, but I did that...Haha.. But it's really for a gathering with my Secondary friends. I wasn't able to be there early for their potluck session, thus I compensated with my brownies with ice-cream.

It was my first attempt at making brownies from scratch although many people tell me how easy it is to make from scratch. Laziness always overcome me. Just can't help it =) From the title, you can tell how thick and chocolatey my brownies are.
So here's my recipe for the brownies with some modifications.
*Warning* This recipe requires good arm strength. Not for the weak! (LOL... Just kidding about the 2nd part, but it really requires alot of stirring.)

Thick Cocoa Brownies (Makes 16 large or 25 smaller squares)
http://www.epicurious.com/recipes/recipe_views/views/108346


Ingredients
1 and 1/4 sticks unsalted butter (I used 155g)
225g of fine sugar (I feel that the amt of sugar can be reduced further)
85g plus 2 tbsp of unsweetened cocoa powder (You can reduce this if you don't like a strong cocoa taste)
1/4 tsp of salt
1/2 tsp pure vanilla extract
2 cold large cold eggs
60g all purpose flour
2/3 cup walnut or pecan pieces (Optional)

8-inch square baking pan

Method
1) Position a rack in the lower third of the oven and preheat your oven to 162°C or 325°F (I put mine to 175°C)

2) Line bottom and sides of baking pan with parchment paper or foil, leaving an overhang on 2 opposite sides for easy removal of brownies from pan.

3) Combine butter, sugar, cocoa and salt in a medium heatproof bowl and set the bowl in a wide pot/pan of barely simmering water.

4) Stir from time to time until butter is melted and the misture is smooth and hot enough that you want to remove your finger fairly quickly after dipping in to test.

5) Remove the bowl from the pot/ pan and set aside briefly until mixture is only warm, not hot.

6) Stir in the vanilla with a wooden spoon. Add the eggs one at a time, stirring vigorously after each one.

7) When the batter looks thick, shiny and well blended, add the flour and stir until you cannot see it any longer, then beat vigorously for 40 strokes with the wooden spoon or a rubber spatula. Stir in the but, if any. Spread evenly in the lined pan.


8) Bake for 30-35 minutes until a toothpick plunged into the center emerges slightly moist with batter. Cut into 16 or 25 squares.


The results?
Thick, chocolatey brownies that are ever so delicious with a whooping scoop of vanilla ice-cream!

Sweet Bakes

Sunday, February 18, 2007

Makan Places: 恭喜发财 (红包一个来)

Here's wishing everyone a very Happy New Year and may all be blessed with abundant wealth and great health!


I'm sure most of us will have at least one "Lo hei"(
捞鱼生) session during this period of time and I had my first "lo hei" today with my family and relatives.

We went to the JUMBO Seafood Waterfront which is located at the Singapore Indoor Stadium. First up was the salmon yu sheng which was too sweet for my liking. The only thing that I liked was that there was alot of the crispy Chinese shrimp crackers added to it *crunch crunch*
For those who have no idea what I'm talking about, the pictures below illustrates the steps to eating yu sheng. Follow closely...

Step 1: Arrange all ingredients neatly on a big plate.
Step 2: Everyone to pick up a pair of chopsticks.
Step 3: Toss all the ingredients into the air (the higher the better) and say auspicious wishes 吉祥话 at the same time.
Step 4: Tuck in!

Our family's kamquat & Sunkist oranges. LOL

Thursday, February 08, 2007

Sweetbakes: Easy Shortbread

This is one of the few things which I always liked to bake because this is really EASY...And I mean it... Having bad encounters with baking before, I'm usually not very adventurous with baking anymore. Unless I'm really feeling as if I have extra time and money to spare then I'll try baking something new..

Then again, home baked stuff are probably the best gifts to your friends and family. I personally feel very happy when I receive home baked cookies or cakes as gifts as it shows how much I mean to the person.


Here's the recipe:

Meat :Paper-wrapped chicken 纸包鸡

I have been wanting to try this recipe as I'm quite fascinated by how we can fry chicken that is wrapped with a paper...And coincidentally, I found this recipe from the Food & Travel magazine which I bought last year. It is a pretty easy recipe, just that the frying process was a hell lot of splurting oil. *OUCH*
But it turned out not too bad for my 1st attempt. =) Lots of beginner's luck...

SO here goes the recipe...

Paper-Wrapped Chicken
(Serves 4)


Ingredients

1 chicken (1.2 to 1.5kg) *I only experimented with 1 big drumstick*
100g ginger
2 tbsp Chinese wine (I use Shao Xing wine, can replace with Meigui Lu
玫瑰露
or cooking sherry)
2 tbsp sesame oil
2 tbsp dark soya sauce
2 tbsp pure maple syrup (or honey)
1 tsp sugar
1 tsp salt
1 bunch coriander leaves
2 red chillies, sliced diagonally (I used chilli padi & forgot to slice diagonally)
12 pieces of parchment paper (15 cm square)
Oil for deep frying


Method
1. Cut chicken into serving sizes, removing visible fats.

2. Pound ginger to a pulp with mortar and pestle. Then add chinese wine.


3. Squeeze ginger juice over chicken pieces and add the rest of the seasoning. (It will not matter if some ginger pieces dropped in, it will add to the rustic feel of the dish.)

4. Marinate chicken pieces for at least 6 hours, or overnight would be better.

5. Place a sprig of coriander and a few slices of chillies on a square of parchment.


6. Place chicken pieces on coriander and wrap up into a packet. (DO make sure that your chicken is fairly dry and not with alot of marinating juice. Also wrap your chicken properly to prevent the liquid from spilling into the oil.)


7. Deep fry chicken packets in hot oil to brown. Then place in 250 deg C oven for another 10-15 minutes to finish off.
(I used the extra sauce that is still inside the paper packages to thicken into a sauce to pour over the chicken) Serve hot with white rice or plain fried rice noodles.


That's all folkS!

Wednesday, January 31, 2007

Makan Places :Botak Jones - Where you can find cheap and authentic American Food!

As my heading suggests, I would really recommend Botak Jones to those of you who love American food and have a hearty appetite. The portion is really biggggg, with almost half a plate of cajun fries and a quarter of a plate of coleslaw with our orders of Cajun Chicken and Fish 'N Chips.

But I noticed that most people can't finish their fries and slaw.. Such a waste...me and Marky sat there looking at the cleaner uncle throw all these food away..

Imagine how many less fortunate people in the world without food and here we are wasting food...Maybe Botak Jones should reduce the portions abit or offer kids sized meals so that small eaters will not have to waste the food...

Okay think I digressed too much.. Here's the moment you've been waiting for...

*drums*

Picture Time!

How often do you see people serving malt vinegar and mustard at coffeeshops? Probably only here...


Cajun chicken - Really gooood...Although it looks hard, but it is really tender inside. The cajun fries are wonderful...But too much.. I tried my best to eat as much as I could but still, alot was wasted. Coleslaw is pretty good too and goes well with the rest of the stuff.


Fish 'N Chips - I find that this is not too bad, but a tad too hard for my liking.


Monday, January 22, 2007

Noodles :Aglio Olio with White Button Mushroom

Flu has decided to visit me this morning to make me feel sick the whole day...But since I'm lazy to do my work, I've decided to update my blog. Otherwise, Markie will start saying that my blog is coming to an end soon. Like my previous blogs. ARGHHHH.. Totally not supportive, next time don't cook nice food for you already. Humph!

Anyway, the food of the day is Aglio Olio.

An easy to make dish and an all time favourite. The basic ingredients are just spaghetti, olive oil, plenty of garlic and red pepper. Sounds easy right?

I've tried this dish many times and I think the best combination is still with white button mushroom. So, I fried this for a BBQ session with my Markie & the womenz. Comments were all pretty positive (although it was already cold), so here's my recipe for my version of aglio olio for you to try it out!

Aglio Olio with White Button Mushrooms


Ingredients:
1/2 a packet of Spaghetti/Linguine (The actual amt should be a little less than that)
2 packets of white button mushrooms, sliced into 2mm slices (Quite expensive @ approximately $3.95 each)
4 tbsp butter (Amt can be increased to suit your taste)
5 tbsp olive oil
1 clove of garlic, chopped finely
Salt and black pepper to taste
Red pepper flakes (I used finely chopped fresh red chillies)
Parsley for garnishing (It really adds to the taste too)

Method:
1. Cook pasta until al dente, about 8-10 minutes.

2. Add salt to the water while pasta is being cooked.

3. Drain pasta immediately into a colander when it is cooked and toss it abit to remove excess water. (Pasta should be placed under cold water only if you are making a salad to stop the cooking process)

4. Place 3 tbsp of butter and 2 tbsp of olive oil into a hot frying pan. Add 2 tsp of garlic when butter has melted and fry till fragrant.

5. Add button mushrooms and let them sit in the frying pan until bottom is caramelized.

6. Toss mushrooms and fry for another 5 minutes. (You may want to add more butter or olive oil if you find the mushrooms very dry)

7. Add salt and pepper to taste. Dish the mushrooms out.

8. Add 3 tbsp of olive oil to hot pan. Then add the remaining garlic and chilli to fry till garlic is slightly browned.

9. Add in the cooked pasta and stir fry. At this point, add 1/2 of the sauteed mushrooms and some excess liquid to the pasta for more flavour.

10. Season your pasta with salt and pepper to taste.

11. Lastly, place the remaining mushrooms on top of the pasta and sprinkle parsley generously over the top.


Wednesday, January 17, 2007

Makan Places :Juju Hokkaido Hotpot

I'm finally back after a very long break.. Actually this post was supposed to be out long some time ago, if not for MARKY..you know what you did that day...=Þ

Okay..back to the topic...
Juju Hokkaido Hotpot was introduced by the founder of Tao's Restaurant and having tried Tao's, we decided to give Juju a try...another reason was because we had a 20% discount voucher.. hehe

The food was pretty good and as the name of the restaurant suggests, they serve hotpots...The
kombu soup base was light and refreshing while the other ingredients of the hotpot were very fresh. You can choose from the beef, fish, seafood or chicken set and this set meal includes appetizers, a small drink and dessert. All these for approximately $25 before tax (per pax).


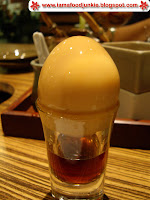
First up, we were served a simple yet luscious braised egg with their own special sweet sauce, which I have no idea how to describe the taste. But it's really good.


Next, the sauces came in small little teapots and square dishes.

On the left: Sweet chilli sauce
Middle: Peanut sauce and some herb paste

Right: Japanese soya sauce


Our choice of cold soba came soon after the display of sauces, but I found the sauce rather salty for my liking and the noodles were too soft.


This was a plate of apparantly different dumplings which doesn't really taste very different to me. Don't know if its me or is it the dumplings =) The shot glass on the left contained minced chicken meat and a piece of celery was cleverly placed in it for customers to dig the chicken meat out to place it into the hotpot.


Here's our two main courses of the night. I ordered the fish set, which came with 3 types of fishes while Marky chose the seafood set. The meats were beautifully placed on steel and wooden "ships". This really made the food looks more appetizing. Anyway, there was a piping bag near the fish head which contained fish paste. The interesting thing was that we can just pipe the paste into the hotpot and when it is cooked, it will float to the top. The end reults were springy and yummy fish meat strips.

When we were almost half finished with our hotpot, there was this special icy plum drink which was served. I can tell you that this is really superb! Loved this drink. It's very cold and sour, with the right amount of sweetness. It was a good thing that Marky doesn't like plums, so guess wat.. I got both glasses of plum drink! Wahahaha Anyway, it is the smallest glass of plum drink that I have ever drunk. The size is almost like an elongated shot glass.


Here are the desserts that we ordered to end our meals.

From the left: Black glutinuous rice with a scoop of yam & fruits sago thingy


My verdict? I wouldn't mind bringing my parents there to eat! =)

Saturday, December 30, 2006

Veggies :Oven baked onion rings

Having tried deep frying onion rings, I've also experimented with oven baked onion rings to create a healthier alternative to this sinful yet delicious finger food. Here's what I did...
Oven Baked Onion Rings


Ingredients:
1 large yellow onion, cut into rings (Only bigger rings are used)
1 tbsp milk
1 egg white

Crumb Mixture
Breadcrumbs
2-3 tbsp cornmeal
(Optional)
1 tsp paprika
(Optional)
1/2 tsp salt
1/2 tsp pepper

Method:
1. Mix all ingredients under crumb mixture together.

2. Mix milk and egg white together.

3. Dip onion rings in milk and egg white mixture.

4. Next, dip into crumb mixture.

5. Repeat steps 3 & 4 for thicker crumbs coating
6. Lightly grease oven tray with olive oil and preheat at 200 degrees. Bake for around 30 minutes at 170 degrees, flipping onion rings after approx. 10 minutes (Baking time varies from oven to oven. Best gauge is when onion rings turn golden brown)


Friday, December 29, 2006

Veggies :Fried Kai Lan

I'm sure many people has eaten stir fried Kai Lan but what about Deep Fried Kai Lan? I came across this recipe in the same cookbook as mentioned in previous post and decided to give it a shot! The verdict? Me and mum felt that it tasted like "cai poh" (Chinese pickled radish).. So weird.. Haha.. But I think it taste goooood.. A good substitute to "cai poh". But the down side is that it also has to be eaten the moment it is cooked as it will lose the crispness pretty fast. But overall an interesting dish to try.

Fried Kai Lan


Ingredients A:

500g kai lan
A small portion of carrot, diced
oil for deep-frying
1/2 tbsp shredded ginger
1/2 tbsp chopped garlic
Ingredients B:
1 tsp caster sugar
1 tbsp shredded dried cuttlefish (I ommitted this)
1 tbsp small ikan bilis, fried until crispy
Seasoning:
1 tsp oyster sauce
1 tsp light soya sauce
a little shaoxing wine
a little corn flour water for thickening
Method:
1. Separate kai lan into leaves and stems. Cut leaves into fine shreds and cut the stems into slices. (I diced my stems)
2. Heat up oil for deep frying, deep fry kai lan leaves until crispy. Dish and drain. (I suggest adding all the leaves to deep fry at the same time so that it doesn't burn that easily. Oil shouldn't be too hot and only fry the leaves for approx.1 min)


3. Leave 1 tbsp of oil in wok to saute ginger and garlic until fragrant.
4. Add in kai lan stems & carrots to stir fry for 1 minute.
5. Add seasoning and stir fry till cooked.
6. Thicken with corn flour water and dish up.


7. Put fried kai lan leaves on top of stems, sprinkle Ingredients B over it and serve.
*Fry your stems and carrots first and deep fry leaves last to ensure crispness*